Friday, April 20, 2012

Chocolate Wasted Cake Recipe

Looking at food on Pinterest after awhile starts to make me drool. Some of the desserts look to-die-for! I literally force myself not to pin ones that I know are super bad for me, but when I saw the Chocolate Wasted Cake, I couldn't resist. I held off on making it until I knew I was going to a function where it could be shared and not left on my table to be eaten for every meal and snack the whole day long. Since my husband Chris and I were going to his family's for Easter--I thought this would be great to bring along, especially since he has two brothers in college who devour food.

Ingredients:
chocolate cake mix (plus the added egg/oil/water)
chocolate chips (1 bag)
can of frosting
multiple candy bars of choice (I did kit-kat, snickers, and twix)

The total cost for my cake was under $10! I loved this because I often feel like these cakes are super expensive, but it looked like a bakery cake by the end for much cheaper!

The first step is to simply make the chocolate cake mix. I made it in two 9x9 inch round pans. I would suggest doing it in 8x8 rounds instead to make it a fuller cake but I only got the 9x9 off our registry. :-) Make sure to let the cake cool all the way. I am terrible at waiting during the cooling process!

After it was finally out, I started to frost but got super nervous because I only had one can of frosting. I decided to do the coolest trick ever. All you do is empty the can of frosting into the mixing bowl and then beat it. It makes it fluffier and it easily covered the entire cake. A trick for getting the frosting out of the can: Simply take a dull/butter knife and briskly circle the inside of the frosting can right along the edge with the knife. Then tip the frosting can over, and wooosh it all comes out in one big clump.

Once I frosted it, I put on the chocolate chips. This part took forever! I let every single one of my perfectionist tendencies come out. I thought it would look neat to have white chips in with the semi-sweet and since I had some sitting in my pantry, I added them in.


I couldn't stand sitting and putting the chips on so I put on a tv show and did it during that. It made it much more enjoyable.

After the chips are on, I started to cut the candy bars that I had. You can cut them in whatever sizes you want. I cut the mini snickers into three strips and then cut each of those about 5 times. Once you have cut them all, sprinkle them on top of the cake. I was a little shy on the candy bars. Next time I will fill the whole top with it since it really tastes great!


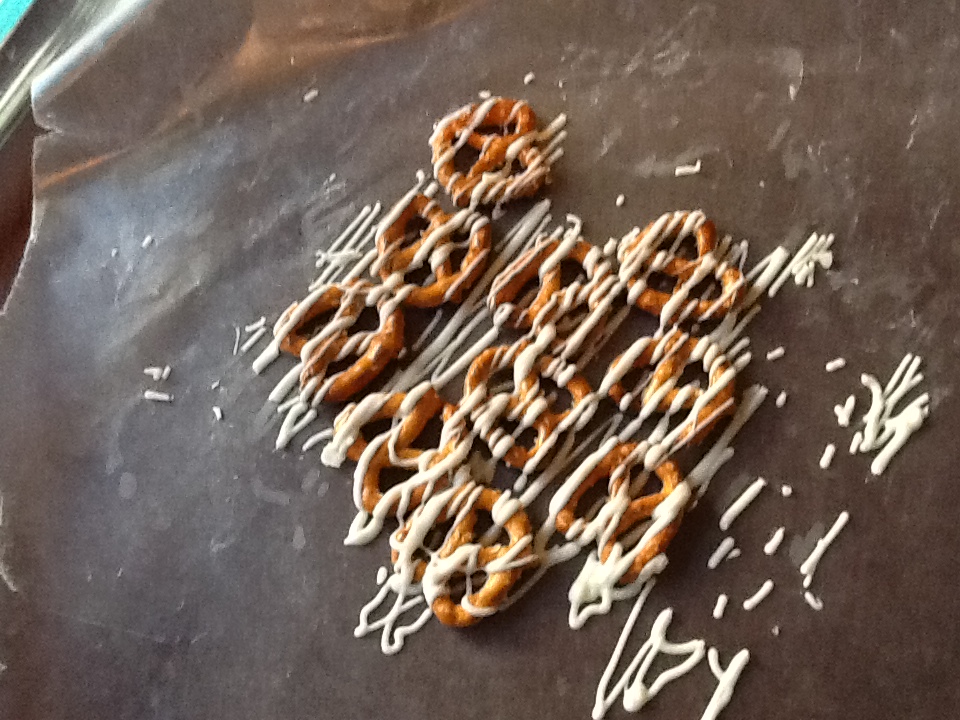
At this point, there is only one step left. Simply melt some chocolate chips in the microwave to drizzle on top of the cake. I am awful at drizzling with a fork so I use the baggy-technique. I simply spoon the melted chocolate in a sandwich baggy and then snip the corner of the baggy to the width I want for the drizzle. Then I simply twist the top of the baggy, squeeze, and move it back and forth across the cake.

You can add as much as you want. This was my final product:


I swear it looks like 1 million times better in real-life. I had to use the iPad camera that didn't have a flash and it definitely dulls and fogs the pictures.

In the end, Chris and I dropped it off at the in-laws as we went to my parent's house. The next morning we came back to find that all of it had been eaten except for two slices! I would call that an instant success!

---Lyzz

The original site/idea that I saw this at was: http://artofdessert.blogspot.com/2011/10/chocolate-wasted-cake.html I did change my recipe since I did not put in liqueur.


Monday, April 2, 2012

Easter Egg Wreath

 I aspire to be one of those people who has her house totally decked out in appropriate holiday decor weeks before the actually holiday arrives. (AKA: my mother in law.) Instead it's less than a week until Easter and I just took down my kids' four leaf clovers and snowmen crafts only to find that my collection of Easter decorations is unfortunately very sparse. I'm not usually one to go out and buy decorations, so I decided to go the cheap route and use whatever odds and ends I could find at home...Voila! I ended up making this wreath inspired by this Pinterest find:
http://frillsfluffandtrucks.blogspot.com/2010/03/easter-egg-wreath-tutorial.html

Supplies Needed:
a basic wreath 
ribbon (optional)
3-4 dozen plastic Easter eggs
hot glue gun
newspaper (to cover gluing area)

Directions:
1. Make or a buy a wreath. (I stuck a piece of wire down the middle of foam PVC pipe covering and taped the ends together to form a circle.)

2. Wrap ribbon around the wreath so that any uncovered surfaces won't look so nasty.


3. Start gluing! After some trial and error, I discovered that it works well to glue the eggs to each other rather than always trying to glue them to the wreath. You don't need to glue any eggs to the back of the wreath - just the front and a bit of the sides.


4. Let everything dry. If desired, add a bow. Then hang up and enjoy your work of art!


Happy Easter! He is Risen!


Wednesday, March 28, 2012

Crayon Melting on Canvas

I think seeing the crayon melting canvas art was the fi thing that attracted me to Pinterest. I've had it pinned for forever and finally did it.
It's not quite as simple as it appears. It took me a little while to figure out how best to do it.

Steps:
Find crayons and a canvas. (I needed 23 crayons for each 8x10 canvas)
Use hot glue gun to glue crayons on canvas. Glue each crayon individually rather than placing them all on one line of glue.
Prop canvas up at an angle.
Point hair dryer at crayon tips until they begin to melt and drip. Experiment with the angle of the canvas and hairdryer.

Attempt #1
Patiently sat pointing hair dryer on low heat at crayons. Some crayons melted much faster than others.


 Attempt #2
Started on high heat, then switched to low heat when the crayons started melting.


Attempt #3
Used high heat the entire time while moving the hairdryer back and forth across the board.


Observations:
I used all Crayola crayons. Yet different colored crayons melt differently, regardless of how you hold the hairdryer.
The crayons will start to melt under the wrappers, causing the wrappers to darken. I didn't like this, but I'm not sure if there's a way around it.

Honestly, it was a fun project. My husband isn't too sure about it. He said it was a waste of crayons. However, he did like the green and yellow one - Packer colors.

Becky

Tuesday, March 13, 2012

Clover Painting

I've been in a craft rut with the kids lately. I think I did too many elaborate projects with them and ended up burnt out. So when I saw this easy craft, I decided it was perfect for getting back in the game. Simple, yet fun.
Never fail, I can always find a wrinkly pepper in the vegetable drawer.
(I won't speak for another sister whose vegetable drawer is filled with beer. Don't worry, we all love you.)

Clover Painting
Cut the pepper in half. Cut out the seeds. Pour green paint in a pan. Stamp and paint!


I'm a nerd, so I did try to wash the paint off my pepper so we could still eat it. Common sense prevailed, and I threw it away. Next time I may cut thick slices of pepper to use instead of two halves. 

Both kids enjoyed it. The 5 year old made collages and clover people out of her stamps. The three year old made "clover trees".


Sunday, March 11, 2012

Rainbow Cake

Birthday time always brings so much excitement to our house! Each year my daughter picks out her own birthday cake. She LOVES to choose every detail of the cake: the batter, icing, decorations, shape, and candles. Then she changes her mind a thousand times. :-) This led us to our beautiful, unexpected, rainbow cake!
My daughter and I went to the store to choose the type of cake she would have for her birthday. We saw everything from rainbow chip to marble to five different types of chocolate. After standing in the aisle for at least ten minutes, she chose a white cake. I was shocked! I asked if she was sure she wanted it. She said yes.
Well......the next day we got ready to make her cake. I got out the cake mix and she was devastated. She was convinced that she did NOT choose a white cake mix. This quickly turned to sheer joy when we decided to venture into the unknown to create a rainbow cake!

Supplies Needed:
White cake mix
Food coloring
Pan of your choosing
Lots of spoons and cups!
Optional: white frosting, jelly beans, and mini marshmallows


Directions:
Make the cake batter as directed on the back of the box. Divide the batter into cups according to the number of colors you are going to use. Add 3 drops of food coloring to each cup of batter. Add more to get desired colors. (I mixed red and yellow to get orange.)


Grease pan as directed on cake box. Pour batter into the pan. At this point your child is probably beginning to get very excited. My daughter loved pouring the different colors into the pan.


Use a knife to swirl the rainbow colors. The best techniques is to make sure the knife is not lifted up at all. Just keep swirling. Also, be sure the knife is touching the bottom of the pan. The excitement peaked here for my birthday girl as I let her mix the colors under very close supervision.


Bake cake as directed. You will want to check on the cake early, as it may bake quickly. A small amount of batter is lost when it is transferred from bowl to cup to pan. Therefore, your baking time will most likely be shorter than average.

My daughter chose to make her rainbow cake into a treasure chest. However, you could easily make your cake into the rainbow cake pictured below. Just add jellybeans (I used Starburst) and mini marshmallows. As you can see my daughter enjoyed decorating this cake herself!


Perfect for a rainbow birthday or St. Patrick's Day!

(The rainbow cake batter was my own idea. The jellybean and marshmallow cake decorations were inspired by Family Fun. http://familyfun.go.com/recipes/catch-a-rainbow-cake-687429/ )

Thursday, March 8, 2012

Wedding Bouquets

So I decided to buy a bunch of flowers and futs around with them, seeing what I liked for my wedding flowers. It was amazingly fun!

Step 1: Buy lots of flowers - and have everyone in the grocery store do double-takes at you all loaded up with flowers.


Step 2: Arrange them into a beautiful bridesmaid bouquet and put it next to the bridesmaid dresses.


Step 3: Call your little sister and tell her to come over asap - then have her be your model!! :)


Step 4: Make a pretend table arrangement from random household items such as glasses...


Step 5: You're done! Enjoy all the flowers by creating a huge vase of them on your dining room table, a vase of them in your kitchen and a vase in your bedroom :)


Happy flower-arranging.

Noodle Bracelets


Craft time is always an adventure with my two and three year old kiddos! Although I wish it happened everyday, it doesn't. And when it does, it usually only lasts ten minutes tops. But today I hit the jackpot: a craft that kept them busy for 20 minutes, looked halfway decent, and could even be used as a gift for Grandma.

Supplies Needed:
Pipe-cleaner
Noodles (any kind with a hole)
Rubbing alcohol
Food coloring
Ziploc bags
Paper Towel

Directions:
We dyed the noodles ahead of time. Dump 1/4 cup rubbing alcohol into a Ziploc bag. Add 10 drops of so of food coloring and swish around a bit. Then add 1-2 cups of noodles and shake well to coat. Dump out onto paper towel to dry for a couple hours. Once the noodles are dry, string them onto the pipe-cleaner and twist the ends together to make beautiful bracelets.


Some kids like to make patterns with their noodles.


Some kids just like to taste them.


Either way, they had fun and I got lunch made.


Wednesday, March 7, 2012

DIY Map Coasters

Chris and I have been living in our house for over 7 months and we still did not have coasters! I was determined to change that. After seeing a project on Pinterest where they took photos and modpodged them to canvases for wall decorations, I decided to experiment.

I bought a 24 pack of 4x4 Artist Loft canvas panels. They only had a 24 pack for about $12, but I had a 50% coupon on it. I only used 6 of them so I can use the other panels for other projects or to make more coasters once we visit more places.

The first step was to make a list of places we have taken trips to together. I searched at mapquest to find maps of the different places. I took a screen clipping of each, editing each map to 4x4 in Microsoft Word. I then printed each map in color and cut them out. After cutting each to size, I laminated the maps and cut exactly along the edges. This was the trickiest part because the laminating machine went completely crazy on me! I had to refeed the laminate multiple times. Sometimes the easiest steps take the longest!


After cutting them out, I modpodged the laminated maps to the canvas panels. I put the panels face down in order for the map to fully stick.


My maps were not all exactly 4x4 so the edges hung over the sides of the canvas panels. You can see in the picture on the left. After they dried, I trimmed the edges by running a scissor along each edge of the panel.

Once I had that done, it was time to put a nice finishing coat of modpodge on the top of each coaster. Since I was at work supervising the library while I was completing this project, I did not think to bring along a paintbrush. Therefore, I used a pen and my finger to spread the modpodge evenly over each map.

You can be generous on the amount of modpodge that you use. Make sure to spread it onto the sides so that the laminate edges turn smooth. As they dry, they will look like the picture on the right. No worries it dries to look like the picture below!


Once they have dried, you will have your coasters completed. I stacked them in a pile, tied a ribbon around them, and made a tag that said, "Oh the places we've been...and the places we'll go..." I then gave it to my husband. He loved it! Now when we host others, it can be a conversation starter about why we went to the various places on the coasters. I can't wait to travel more and add them to the stack. I hope to write on the back of them the dates and a brief description about each trip.
                                                                                                                                             --Lyzz

Sunday, February 26, 2012

Fruit Palm Trees

Sometimes the best Pinterest finds are the simplest.
I took a kiwi, banana, and a Clementine orange. Ta-da!
(However, Anna still did not eat bananas - even as palm trees.)

Friday, February 17, 2012

Freezer Organization

This was my freezer...

3 trips to Dollar Tree and $5 later...

(It really should have only taken two trips to Dollar Tree. Be warned: they do not accept Mastercard.)
The first trip to Dollar Tree I bought a bunch of different types of baskets. I took them home and tried them out in my freezer. The second trip was to exchange them and get the ones I really needed.

The baskets are Veggies and Fruits. The bottom bins are Beef, Chicken, and Other Meats (fish, pork, brats). Any large items like pizzas, ice cream, and whole chickens are in the basement freezer. Plus, then we're less likely to dig into ice cream or throw in a pizza at night. That walk to the basement is a long one, yaknow.

Now I just need some cute laminated tags for the baskets. Everything looks better tagged and laminated.

All in all, my favorite part is just pulling out the fruit basket in the morning to make smoothies. It's so much easier than digging around in the freezer for all the random bags of fruit!

Here's the link to the Better Homes and Gardens pic that inspired me on Pinterest:
http://www.bhg.com/kitchen/storage/organization/ways-to-store-more-in-your-kitchen/#page=7

Saturday, February 11, 2012

Back-to-School Goodies: Husband Edition

My husband is one of those guys that would do anything before going to school. The fact that he commutes over an hour each day adds to his hatred. As the new semester approached, I wanted to do something to encourage him with his final semester before graduation! I saw a similar project on pinterest, but it was done as an "I love you" package.

I went to the store and picked up some of the cheapest items that I could find that I could also think of a cheesy saying to go with.

I ended up with:

Lifesavers                                Sobe
Coffee                                      Coffee
Gum                                        Donut
Oranges                                   Snickers
Twix

I created labels for the different items. I wanted to link them to this page, but I couldn't figure out how to do that...perhaps, you can copy and paste the picture?


After printing them off, I simply taped them to the different items and then placed them into a gift bag.


Needless to say, my husband loved it. :-)

-Lyzz

Tuesday, February 7, 2012

Chocolate Covered Strawberries/Footballs

When I was asked to bring something for my family's Superbowl party, I immediately went to Pinterest for ideas. I am someone that has to bring something cute to parties!

Since strawberries were on sale at Sentry for $2.50, I bought a container of them. (I always am skeptical if I am getting my true 16oz of strawberries since I worked at a grocery store where they would pick out the rotten ones and still sell the containers minus one or two strawberries.)


Needless, I bought a container and decided to make chocolate covered strawberries football style.

Recipe:

1 container strawberries
1/2 bag chocolate chips
1/5 bag white chocolate chips

Melt chocolate chips. Dip strawberries so just the greens are showing. Set on wax paper. Wait until dry.


Melt white chocolate chips. Scoop melted chocolate into baggie and slit the corner to get a slim hole. Put a straight line down the middle and then three lines across.


Once dry, put them on a fancy plate and enjoy! (Note: I am not a perfectionist with the lines.) :-)


I had leftover white chocolate chips so I took out some pretzels and drizzled them. My husband got to them before I could get a picture. This was all that was left!